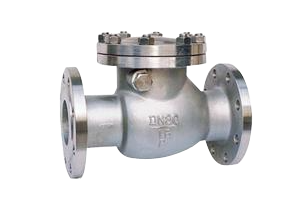
The swing check valve, also known as a one-way valve or non-return valve, is designed to prevent backflow in pipelines. The installation tips for swing check valves mainly include the following aspects:
1. Preparation
(1) Understand Relevant Regulations and Standards: Ensure that the installation of the swing check valve complies with national regulations and standards to ensure system safety, environmental protection, and energy efficiency.
(2) Prepare Tools and Materials: Installing a swing check valve requires various standard pipeline tools and materials, such as pipe wrenches, steel saws, welding machines, screwdrivers, and lubricants.
(3) Inspect Valve Quality: Before installation, perform a quality check on the swing check valve to ensure that it is in good condition, with all accessories intact and free from damage or deformation.
2. Installation Steps
(1) Determine Installation Position
Choose a location for the swing check valve that facilitates easy operation, inspection, and maintenance. When installing on a vertical pipeline, utilize the valve’s own weight to aid in positioning.
(2) Mark Fluid Flow Direction
Label the “flow direction” on the pipelines on both sides of the valve to ensure that the arrow on the swing check valve aligns with the actual direction of fluid flow, preventing backflow.
(3) Clean the Pipeline
Clean the inner walls of the pipeline where the valve will be connected using cloths or scrapers, ensuring there are no oils, rust, or other contaminants.
(4) Install the Valve
Install the swing check valve according to the direction of the flow arrow on the valve. Ensure the sealing gasket fits tightly against the inner wall of the pipeline and secure the valve with bolts, ensuring its position is stable and free from movement.
(5) Adjust the Clearance
Adjust the clearance between the check valve disc and the seat according to the valve model and specifications. Typically, the clearance should be between 0.5-1 mm to ensure proper valve operation and good sealing performance.
(6) Connect the Flanges
If the valve connects to the pipeline via flanges, align the flange connections according to relevant standards and secure them with bolts. Ensure the sealing surfaces are smooth and properly aligned.
3. Precautions
(1) Handle with Care
During transportation and installation, handle the valve gently to avoid severe impacts or banging, which could damage the valve.
(2) Ensure Closed Position
Before installation, ensure the valve is in the closed position to prevent accidental leakage of the medium.
(3) Install a Filter
For media containing impurities or particles, install a filter upstream of the valve to protect it from damage.
(4) Regular Inspection
Regularly check the valve's operating condition and sealing performance during use. Address any abnormalities promptly.
(5) Special Conditions
For applications involving high temperatures or high pressures, select a valve with a special design suitable for the operating conditions to ensure proper system operation and safety.
4. Installation Tips Summary
(1) Accurate Marking
Before installation, carefully mark the direction of the medium flow to ensure the valve is installed correctly.
(2) Thorough Cleaning
Thoroughly clean the interior of the pipes and the contact surfaces of the valve to ensure there are no impurities affecting the sealing performance.
(3) Proper Adjustment
Adjust the gap according to the valve's model and specifications to ensure smooth operation and reliable sealing.
(4) Secure Fastening
Tighten the bolts in a cross pattern to ensure a firm and leak-proof connection between the valve and the pipe.
(5) Protective Measures
Protect the valve from damage during installation and use, and perform regular inspections and maintenance to ensure proper operation.