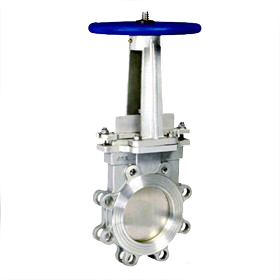
Knife Gate Valves (Knife Gate Valve) are widely used in industries such as mining, paper making, metallurgy, power generation, and water treatment due to their compact structure, rapid opening and closing, and suitability for handling media with solid particles or high viscosity. Particularly in slurry transport and slurry-water mixed systems, the "cutting-type" closing mechanism of knife gate valves offers significant advantages over standard gate valves. However, over time, these valves can experience various faults, such as seal leakage, failure to open/close, and jamming, which can seriously affect equipment stability. This article systematically reviews the common fault types of knife gate valves and provides targeted solutions.

Before analyzing the faults, it is essential to briefly understand the core structure of the knife gate valve:
· Gate (Knife Blade): Designed with a "cutting edge," it can effectively cut through media containing particles or fibers.
· Seal Structure: Typically uses flexible elastomer seals or metal hard seals.
· Valve Body: Mostly of a straight-through design to facilitate media flow, some valves are equipped with self-cleaning channels.
· Actuation Mechanism: Commonly operated manually, electrically, or pneumatically. Knife gate valves are designed with a focus on wear resistance and anti-clogging, but their sealing and structural rigidity are relatively weaker compared to conventional gate valves.
· Internal Leakage (Media Leaks After Gate Closure)
Cause Analysis: Internal leakage is typically caused by wear or damage to the seal faces between the gate and valve seat, leading to seal failure. Additionally, the media may contain solid particles or impurities that become trapped between the seal faces, causing leakage.
Solution: Perform a pressure test to identify the leak point after closing the valve. For worn seal faces, repair or replace the seals with suitable flexible elastomer or metal hard seals. To prevent clogging by particles, regularly clean the valve body and replace seals as needed. For high-frequency usage, consider using metal hard seals to improve sealing performance.
· External Leakage (Leaks at Valve Body or Packing Area)
Cause Analysis: External leakage typically occurs in the valve body at the packing area, mainly due to packing wear or loose packing gland, which fails to adequately seal the media. Additionally, casting defects such as sand holes or tiny cracks in the valve body may also cause external leakage.
Solution: Regularly check the tightness of the packing and ensure it is not loose. If necessary, re-tighten or replace the packing. For severely aged packing, replace it with high-performance graphite packing or a V-type packing with elastic support. If cracks or sand holes are found in the valve body, conduct a penetration test and, depending on the situation, perform welding repairs or replacement.
· Gate Jamming
Cause Analysis: Gate jamming usually occurs when the valve has been in the closed position for an extended period, and solid particles or sediment in the media block the valve chamber or gate guide tracks, preventing smooth gate movement. Additionally, the guide tracks may become deformed or eccentric, causing jamming.
Solution: Regularly cycle the valve to prevent jamming from long periods of inactivity. For media containing solid particles or mixtures, periodically flush the valve chamber to remove sediment. Check for deformations in the guide tracks and, if necessary, adjust and correct them to ensure smooth gate operation. For fouling-prone conditions, use knife gate valves with self-cleaning devices or scraper mechanisms.
· Failure of the Actuation Mechanism
Cause Analysis: The failure of the actuation mechanism may result from faults in the hand wheel or electric actuator, preventing sufficient torque to open or close the valve. Wear or binding in the valve stem threads can also prevent the actuation mechanism from functioning smoothly. Additionally, insufficient air or hydraulic pressure in pneumatic or hydraulic actuators can lead to failure.
Solution: Disassemble and inspect the actuation mechanism, cleaning and replacing lubricants as necessary to ensure smooth operation of all moving parts. Check the air or oil pressure and ensure stable output. If the issue is with the pneumatic or hydraulic actuators, check the pressure regulator, adjusting or replacing components as needed. For frequent operation scenarios, consider using high-efficiency, low-friction electric actuators.